Oh 2020. What a year it has been. I will forever remember it as the year of the toilet paper famine and the year of home poling. Many of us have been self isolating and social distancing for the last few weeks/months with uncertainty of when our beloved studios will be open again. With Zoom video classes becoming the new normal and likely to be a part of our pole lives for a while, having a pole space to practice at home can be a gift. For those of us who are privileged enough to have the space and money for a home pole, having an inspiring pole space can really help motivate our practice.
Whether you already have one and want to spruce it up or you are interested in building one from scratch, here are five steps to help you set up your perfect pole space.
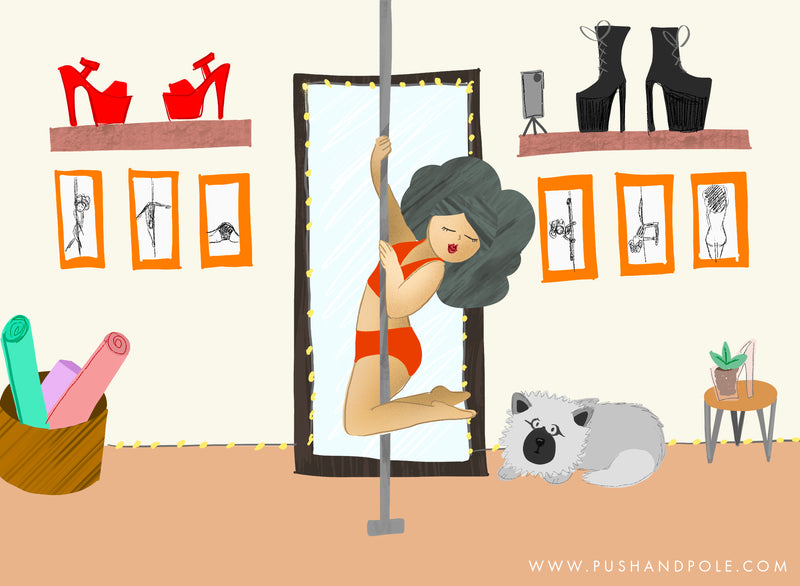
1. Find a space where you have enough room.

The first question is, where are you going to put your pole? Some of us are lucky enough to have separate pole rooms while others may have to sacrifice having a dining table for a pole instead, priorities right?
Whether you have a large space or small space, the main thing to think about is the space around your pole. Ideally you’ll want to be able to extend your body’s length and legs out when moving around the pole so preferably around 5-6ft and up in radius. Those with smaller spaces might may need to adjust the types of moves and tricks you are able to do.
If you’re going to be sharing your pole space with another part of the home where there is furniture, determine if the furniture is easily movable. You can always move lighter pieces of furniture to the side to create more space while you practice and move it back when you’re done. Additionally, you can get a removable/portable pole and remove it each time. However, this can be time consuming for those who want to practice regularly.
In addition to the space around your pole, it’s also good to know how tall your ceilings are. Unless you’re practicing in a super low ceiling basement, most home poles should be able to accomodate the height of your ceiling. Don’t be discouraged if you have low ceilings, there are still tons of amazing low level and floor moves you can still do.
2. Get a Pole

There are many home pole options out there. The three most common types of poles are removable tension mounted poles, fixed mounted poles or a free standing (stage) pole.
A mounted pole is one that is connected to the floor and ceiling. A free standing or stage pole is one where the top is not connected to anything and instead the base has enough weight to balance and hold the apparatus in place.
Many people prefer to have a mounted pole as that is what is commonly used in the studios. For a home pole, most people go the route of a removable one. Rather than fixing the pole permanently with screws into the floor and ceiling, the pole is held up by tension and can be taken down by releasing the tension. A free standing pole will take up more space because of the base around it. While it is portable, those bases can be super heavy! Some people dislike that the pole may wobble more because it is not fixed at the top. However if you like the option of using your pole outdoors or for using it for performances, this is a best option.
It’s highly recommended to get a pole from a reputable brand. The two biggest pole makers right now are X-Pole and Lupit. I purchased a Platinum Stages removable pole years ago but I believe they have now merged with X-Pole. A pole will cost a few hundred dollars and depends on the model, size and finish. While it may be super tempting to buy a cheap “knock-off” pole, you can’t be sure of the quality. Pole dancing is a serious activity and it's definitely worth the extra cost to ensure that your apparatus is safe and reliable. If getting a new pole is out of your budget try looking for second hand poles. Ask around your pole community to see if anyone is selling a pole. Try reaching out to studios to see if they have any unused poles they are trying to sell.
3. Add some mirrors if you like!
Many studios have mirrors so students can see themselves when they’re working on a move. I’ve gotten so used to practicing with a mirror that when I have to do a routine without one I’m totally lost! Studios often have huge mirrors that span a whole wall. While this is amazing to have, it is probably not both physically and financially practical for your home pole space.
First see if you some free space on a nearby wall where you can either hang or prop up a mirror. For home studios, finding a large rectangular full length mirror is your best option. Price wise these can vary significantly. If you don't have enough wall space, perhaps you have a door and can hang a smaller, more budget friendly door mirror on it.
If you don’t want to drop the money on a new mirror, secondhand is a great option! Especially look out for bathroom or closet mirrors as people may be renovating and giving these away for free or super cheap! My current mirror actually came from a second hand bed headboard! It does have a curve on one edge but it is large and does the job. I’ve also seen some very creative solutions where there was a mirror gallery covered in smaller mirrors or all different shapes, sizes and frames.
4. Have fun and decorate.
Now that you have the basic pieces set up, it’s time to create your pole room vibe with decor, wall art and backdrops. If you’re a minimalist, well, congrats you’re all done!
If you have some free wall space, it’s super easy to add pole themed wall art to your space. Print out some photos of yourself doing amazing moves and frame them! Or if you’re feeling artistic, create some pole art! We also have some beautiful digital coloring pages that you can download, color and frame. If you’re feeling crafty, we made this fun DIY neon sign a few years ago.
A backdrop, such as a wall tapestry or DIY bed sheet, creates a nice visual background especially if you enjoy posting your photos or videos on social media. If you have a separate pole space, perhaps paint the walls with a color that inspires you.
Another simple way to add some decor to your space is to display your heels! Get some wall shelves so you can both show off and store your collection! If you have old heels, I’ve seen the cutest DIY where you turn the heel into a planter. Keep all your workout tools and bottles of grip with cute storage bins to keep your place clean and organized.
5. Lighting
If you want to take your pole space to the next level, consider some different fun lighting options. By simply dimming the lights, we feel more relaxed and uninhibited. LED light strips against the wall can add a fun pop of color for when you turn off your lights, and get your shadowban on.
Another popular idea I’ve seen on IG frequently is string lights in the background. You can buy these or maybe re-use your old Christmas lights for a budget friendly hack!
No matter how you choose to create your home pole space, the most important thing to remember is make sure your set up is safe. Everything else is just the icing on the cake!
0 comments